Customize your computer and make it your own! Roll out the welcome mat, put up some posters. You know the drill ;-)
On Linux, everything you need to adjust the way your computer behaves is in System Settings. That means you only need to learn one central center to change your desktop wallpaper, set up printers, adjust network settings, and much more.
To launch System Settings, activate the Activities Overview and search for system settings.
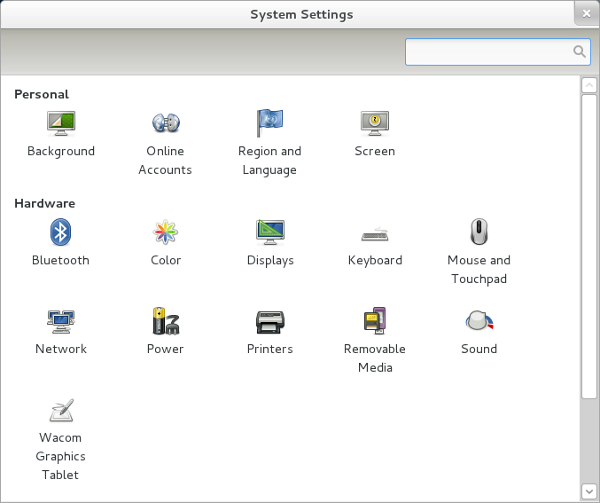
The easiest way to get to know your different options is to just explore the icons, but here's an idea of what each one does:
-
Background
You spend a lot of time looking at your computer screen, so you might as well have a nice picture set as your wallpaper. Choose from a number of included wallpapers, or choose your own photo from your harddrive.
-
Online Accounts
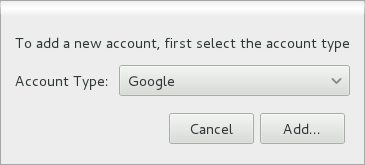
Set up your jabber, google, or other online accounts so that all of the apps you use on your desktop can easily and quickly sign into them. This means you can get google chats right on your desktop whether or not you're using a web browser!
When you open this control panel, it will be empty. Use the plus (+) button in the lower left corner of the window. This will give you a chance to choose what account you'd like to set up.
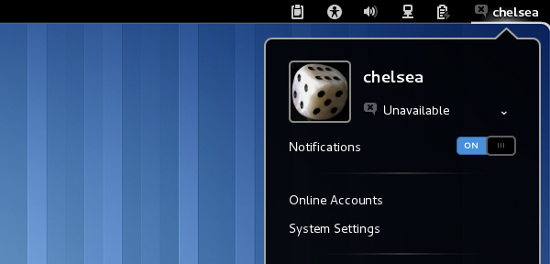
Once you've configured your online account, you can control whether you're Available or Busy or Invisible, and also see a list of your chat buddies, in the upper right corner of your desktop.
-
Region and Language
Set the language your system uses, or just add a secondary keyboard layout for your second language. There are four tabs in this control panel: one to set the Language the system uses, one to set the format of dates, times, numbers, and currency, one to set your keyboard layout, and one to control the language and formats used just by the login screen of your computer.
For language settings of your overall system, use the first tab. By default there may only be three or four popular languages displayed, but you can used the plus (+) button in the lower left corner of the window to choose from a list or a hundred or so.
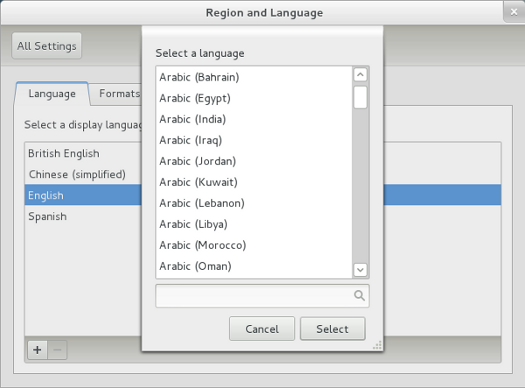
The formats tab is self-explanitory; if you want to change how the sustem uses dates and times and currency amounts, set that here.
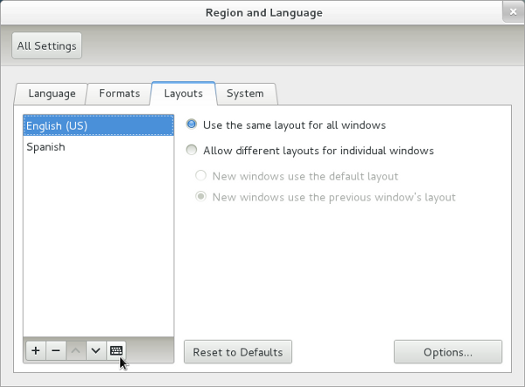
The layouts tab controls what your keyboard "looks" like to your computer. You can change which keyboard you use, or add a second virtual keyboard that you can choose to use only when needed.
For example, if you sometimes need Spanish characters but mostly use the English keyboard, then use the plus (+) button in the lower left corner of the window to add a Spanish layout. Once you've added a layout, you can view it with the keyboard icon in the left corner of the window.
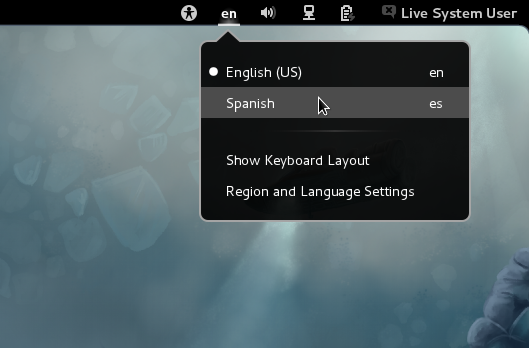
Notice that an abbreviation indicating which layout you're currently using appears in the top right of your screen. You can use it to switch layouts.
A faster way to move back and forth between keyboard layouts is to set a special key to make the switch for you. Click the Options button in the lower right corner of the Layouts tab, and find the Key(s) to change layout drop-down menu. Choose a convenient key to switch back and forth between layouts; if you don't use the Caps Lock, that's a good candidate.
Once set, use the Caps Lock key to toggle between layouts.
The final tab is the System tab; you'll only need this one if you changed your primary language. So if you've chosen to use Spanish (or German, or Arabic, or whatever you like) instead of English, click the Copy Settings button to apply your language preferences to the login screen.
-
Bluetooth
If you're using a bluetooth wireless mouse, keyboard, or cell phone, use this control panel to pair the devices with your computer.
-
colour
For graphic professionals, colour management is important. With this control panel, graphic designers and professional photographers can use different colour profiles for specific monitors, scanners, printers, and cameras.
-
Displays
Connect two monitors, or a projector, to your computer and configure the screens with the Displays control panel. If you open this control panel without only one screen, you'll see the different resolutions your screen is capable of; with two or more, you'll also be able to decide how the screens are arranged in relation to one another.
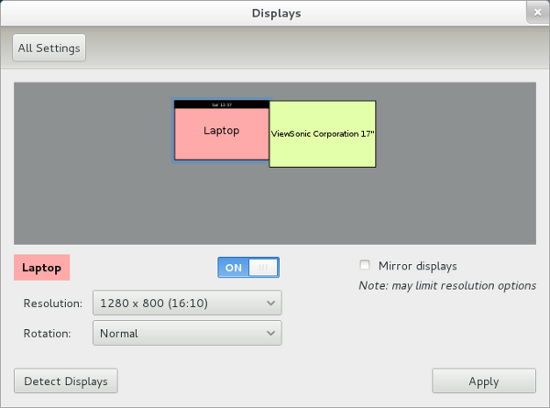
One screen is your default monitor; it will show a black bar to indicate that it is the primary screen; the other screen will be either to the left or the right of your default. You can drag the icon of the screen to where it exists in reality, so that your mouse moves from one screen to the other seamlessly.
-
Keyboard
The keyboard control panel lets you set the speed that the keyboard responds to key presses, and customize common keyboard shortcuts.
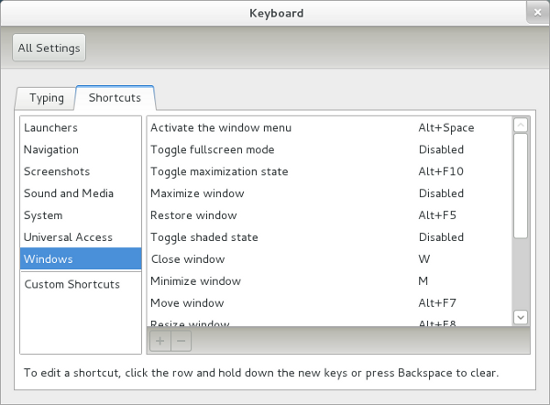
You can change a keyboard shortcut by selecting the category on the left, with individual actions on the right. For instance, if you want to change how you close windows quickly:
- Select Windows on the left
- Close Window on the right
- Click the current keyboard shortcut listed in the right column
- Enter a new shortcut by pressing the key combination you'd like to use, such as control-w (which will appear as simply a W)
The change is immediate, so try out your new key shortcut, and then re-open system settings to set more!
-
Mouse and Touchpad
The mouse tab lets you fine tune how your mouse responds; control the pointer speed, sensitivity, double-click speed, and whether you use your mouse with your left or your right handed mouse.
The touchpad tab lets you customize how your laptop's touchpad works; control the acceleration, sensitivity, tap-to-click, and either edge scrolling or two-finger scrolling (as long as your touchpad supports the function).
-
Network
To find out your IP address on a network, or what access point you're currently connected to, or to set up specialized network interfaces such as a network proxy or VPN (Virtual Private Network, often used to securely connect to corporate networks).
To setup a VPN, for example, click on the plus (+) button in the lower left corner of the window and select VPN from the pop-up menu.
In the VPN configuration panel, enter the login information as defined by your company's systems administrator.
-
Power
Configure battery usage for your laptop.
-
Printers
Add printers, either networked or the one sitting on your desk, with the Printers control panel. To begin, click the button in the upper right corner of the window.
Add your printer by clicking the plus (+) button in the lower left corner of the window. Choose your printer from the list that appears, or if it is a networked printer then specify the IP address.
If the printer needs special drivers to be installed, accept the installation and proceed.
-
Removable Media
When you insert a CD or a DVD, a camera, and media player, your computer will usually ask you what you'd like to do with the media; this way, you get to choose whether you'd rather open a CD in a music player or, in the event that it's a picture disc with your photos on it, in a photo manager.
If you don't want to be asked, you can set default actions in this control panel. Whatever you set here will become the default action for your computer whenever you insert a particular media type.
-
Sound
Change alert sounds, volume, input sources, and output destinations with the Sound control panel. There are five tabs:
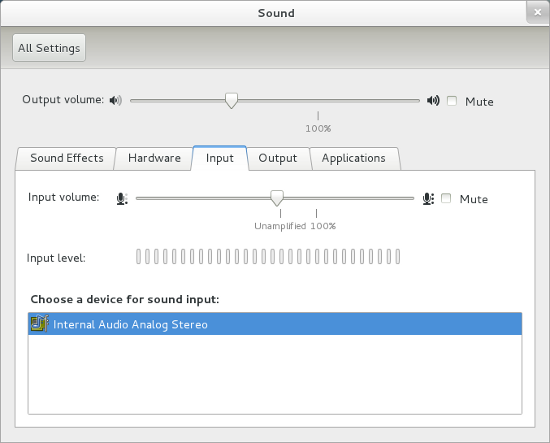
- Sound effects - controls the alert sound effect and volume
- Hardware - if your speakers need fine-tuning (for instance, you're only getting mono sound from a stereo set of speakers), here is where you can choose from the different sound profiles built in to your computer's sound card
- Input - sets the input sound source. This will default to your built-in microphone (if your computer has one) but you might want to choose an external mic, or a mic built into a webcam. You can also set the volume level of your microphone's input here
- Output - choose what sound card (most computers have only one) you want your sound to be sent to; this is useful especially in cases when your computer is also your entertainment center and you want to hear your sound through your home theater system instead of you computer speakers, and so on
- Application - control sound settings specific to individual applications
-
Wacom Graphics Tablet
Configure illustrator tablets from Wacom using this control panel
-
Date and Time
Set timezone and clock display options in this control panel. You can switch between a 12 hour and 24 hour clock; but to change timezones, click the unlock button in the top right corner of the window and enter your administrative password. Once unlocked, click on the map to choose an appropriate timezone.
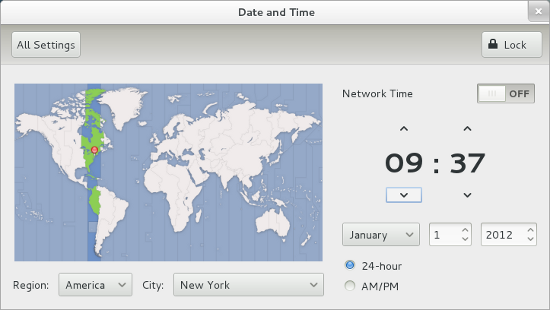
To have the internet manage your time for you (including daylight savings time), activate the network time option.
-
System Info
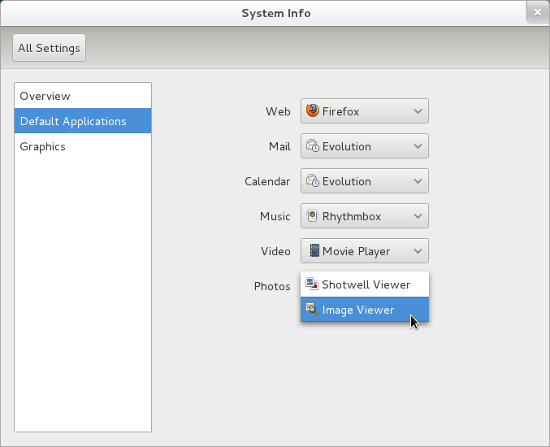
If you need to know the basic specs of your computer, System Info will tell you what processor (CPU) you have, your graphics card (GPU), how much memory (RAM) you have, how much harddrive space you have left, and whether your are running 32bit or 64bit.
You can also set the default applications that your system uses for certain types of files. If you install alternate photo managers or email applications, then you can set those as your defaults. Some applications (like Google Chrome and Firefox) will prompt you to choose your default without going into this control panel, but sometimes you might want to change them manually.
-
Universal Access
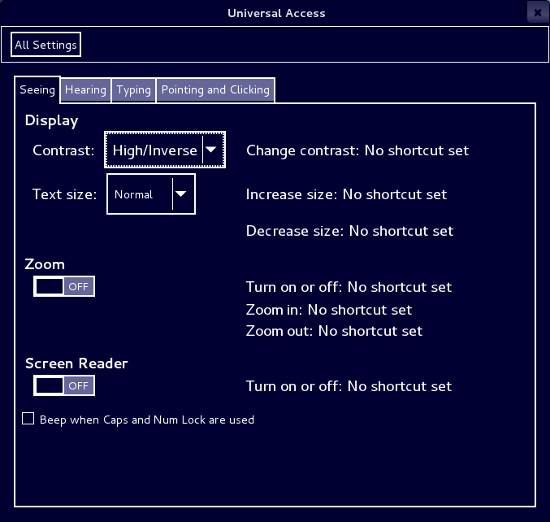
This control panel contains options to increase the contrast of the screen, increase text size, zoom in on the screen, turn on the built in screen reader, activate a visual alarm instead of audible alarms, and change the keyboard and mouse behaviour.
-
User Accounts
If you have more than one person using your computer, you can give each individual a personal account so they can have their own personal settings and data.
Add users in this control panel, give them either standard or administrative privledges, their language setting, and a personalized user icon.
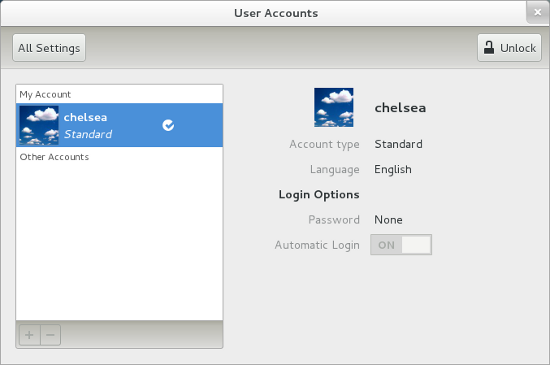
To add or change users, click the unlock button in the top right corner of the window. Add a new user with the plus (") button in the lower left of the window. Decide whether you want them to be a normal user (Standard) or an administrator with the ability to install applications, printers, add and remove users, and so on. Enter their name and then a short, easy-to-remember username and click the create button.
To activate the account and set a password, click the Account Disabled button next to the password field.
To switch between users easily and quickly, go to the user menu in the upper left corner of your screen and choose Switch User.
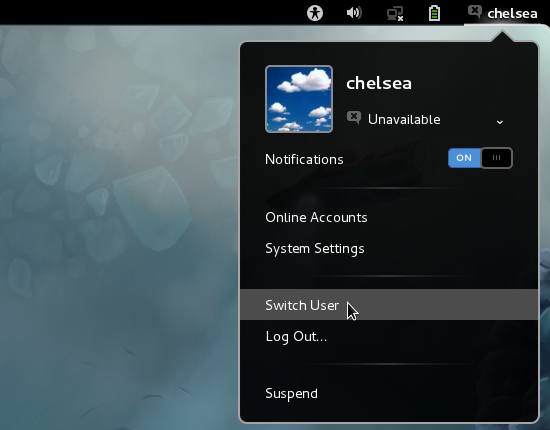
Now the user on the system can set up their desktop without affecting your settings, and start creating their own data without their files getting mixed up in yours. You might want to create a Guest account, too, so that your friends can user your computer without risking accidentally deleting important files or installing unwanted software.
That's all of the system settings on your computer. It's the perfect balance of useful settings that don't require you to get a computer science degree to understand them all, so have fun, and don't be afraid to make your Linux OS feel like home!

