 GIMP
GIMP

GIMP stands for the GNU Image Manipulation Program, and it's a powerful graphics editor that has been compared to Photoshop or Corel. GIMP is suitable for both amateur and professional photographers and graphic designers. Its possibilities are endless, whether you need to crop a photo for printing and framing, or retouch a photo to correct for blemishes, poor composition, or other mistakes.
Professionals who use GIMP generally feel that in navigation and automation, it is far more efficient than any other image editor. GIMP is its own application, though, so it has its own way of doing certain things. This page will go over some basic tasks and how they can be accomplished.
Install GIMP from the Add/Remove application from the Activities Overview.
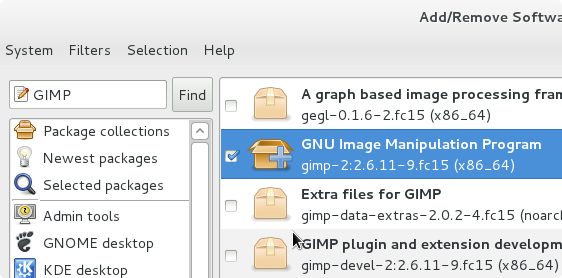
Photo Correction
It's not uncommon to take a photo that is poorly framed, such that you need to crop it in order to make it more appealing to the eye. The tool for this is called the Crop Tool, accessible from the toolbar, or with the keyboard shortcut Shift-C.
Click and drag on your photograph to choose the area you wish to preserve. Even after you release the crop tool, you can adjust the boundaries by grabbing one of the corners or sides of the region and dragging it in or out further. The area around the crop tool dims, so you can get a better idea of what your final product will look like. Hit Return or Enter to commit the change.
You can also rotate your photo, in the event that the original shot wasn't quite as level as it should have been. Shift-R will bring up the Rotate tool and allow you to rotate the photograph as needed; Return or Enter will commit the change.
One of the most powerful tools for photo correction in GIMP is the Color Balance tool, available via the Color menu. Select Color Balance to achieve the color correction palette.
Color correction is often used to either correct for unnatural colors usually caused by lighting conditions (photos taken in flourescent lighting, for instance, often have a green-ish tint), or to add life and vibrance to a dull photograph. Since a great deal of our personal photographs are of people, and since the human eye is generally drawn first to the person or people in a photograph, it is traditional to base any color correction you do on the human subjects in your picture. Human skin tones fall in what are considered the midtones of a photograph.

In the Color Balance tool window, make sure that the Midtones radio box is selected. Use the sliders at the bottom of the window to manipulate the levels of colors in the skin. In this case, less is more; rarely do you want to make big changes rather than simply accentuate existing colors and tones. You'll find invariably that the human skin loves Amber; add a little red and a little yellow to your photograph, and your subject will suddenly come alive. In terms of the sliders in the Color Balance window, this means that you'll move the top slider away from Cyan and toward Red (ie, to the right), and the bottom slider to the left (ie, away from Blue and toward Yellow).
Click the OK button to commit the change. You might want to use Control-Z to undo the change just to see the difference between the original and your corrected version; use Control-Y to restore your changes.
Of course, color correction isn't always only used to bring life into a subject; sometimes you might want the opposite effect. Independent rock bands doing art for their album covers, or digital artists doing artistic pieces, or someone just having a little fun with photos might want to accentuate other color hues. This can be done with Color Balance; just remember that human skin is in the midtones, while the brighter parts of the picture will be affected by the Highlights, and the darker parts by the Shadows.
If you're looking for something a little more drastic, you can always use the Hue-Saturation tool in the Color Menu. This will allow you to select any color and change all occurrences of it to some other color or shade.
Selective Coloring
A popular trick to give photos a stylized look is to take a black and white photograph and selectively color a certain significant element, like a bouquet of flowers. Most photograph specialists charge quite a lot of money for this trick, but it's simple in GIMP.
The easiest way to achieve this effect is in reverse; take a color photograph, choose the color you wish to preserve, and then desaturate the rest of the photo.
Selecting one color is harder than it sounds, since in real life a color is never just one solid color; light creates gradients and tones even within one color hue. But GIMP's selection tools are adjusted for this, as you will see.
To make a selection based on a color, choose the Fuzzy Selection Tool via the keyboard shortcut Shift-U. In the Tool Options palette, change the "Select By" drop-down menu to Hue, meaning that the Fuzzy Selection will now be controlled by color hue. Now click on the color you wish to preserve.
If you don't see a Tool Options palette, then you might need to open it via the Windows menu, in Dockable Dialogs. The Tool Options will then appear as a dialog box that you can anchor to the side of your screen along with the other palettes, like Layers and History and so on.

Real life colors share many hues, so your first attempt might select more than you first associate with a certain color; for instance, a person holding pink flowers might seem obvious to our human eye; we want the pink in the flowers only, not the pink present in the person holding them. A computer doesn't know the difference, though, and so part of the human skin might be selected along with the flowerws. To control this, you must limit the threshold of what is selected. Do this with the Threshold slider in the Tool Options palette.
With a little effort, you'll eventually select only the region and color that you want to preserve. You can add to the selection manually using the Rectangle or Freehand selection tool, as well (hold the Shift key down while selecting to add to the selection).
Once you are happy with your selection, go to the Selection Menu and select Invert, which inverts what is selected and what is not. In other words, now you have everything BUT the color you wish to preserve. Now go to the Color menu and choose Desaturate, which forces everything around the color to be turned into a black and white photograph, leaving only the bright and vibrant color of your choice remaining.
Gimp Paint Studio
It's important to remember that GIMP is a photo editor, not a paint program. There are illustration applications like Inkscape for drawing digitally. However, one thing that GIMP does quite well is mimic the look of different art materials like paintbrushes, water colour, oil, chalk, and so on.
For best results, you will need to install a set of brushes and material emulation tools available as an add-on package for GIMP, called Gimp Paint Studio or GPS for short.
You can download Gimp Paint Studio from code.google.com/p/gps-gimp-paint-studio and either install it manually by copying their presets and config files to /usr/share/gimp/2.0/ or just use the handy installer script, available at klaatu.fedorapeople.org/install-gps.sh
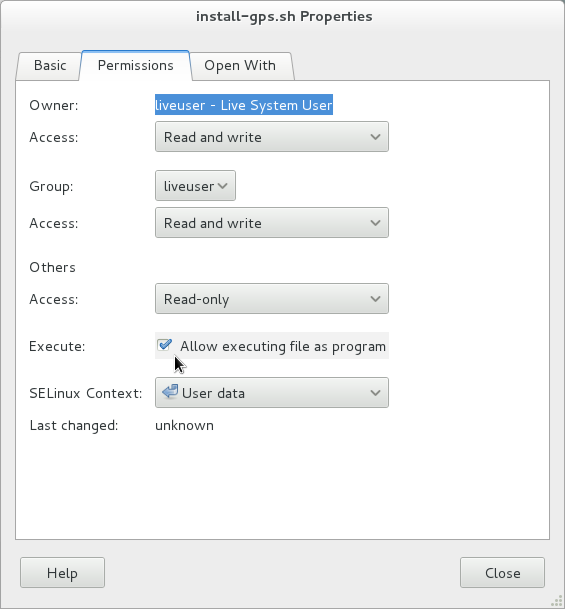
Before you can run the installer, you must give your computer permission to run the script. This is a safety precaution built into Linux to ensure that you're aware that you're running a program downloaded from the internet. To permit the install-gps.sh script to be run, right-click on the file and choose Properties. In the properties window, select the middle tab (Permissions) and place a check mark in the box reading "Allow executing file as program"
Double click on the icon to launch the program; it will download the GPS plugin for you and install it. This will take a while, so be patient.
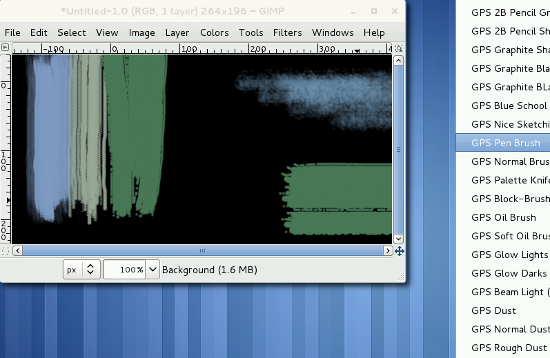
Now launch the GIMP again and you will find a whole new set of color swatches and presets, plus a wide variety of brush types and materials available in your paint brush tool palette. It's designed for large screens so you might have to resize some windows if you're on a laptop.
To load a new brush, click the Restore Options From button at the bottom of the Tool Options. A list will open with all kinds of paint brushes and pencils and pens and chalks and much more to choose from.
Use your new paint tools to create new images from scratch, or you can use them as retouching tools for photographs, or you could, of course, make a mixed media project combining photographic elements and painted or drawn embelishments.
Layers
Of course one of the most powerful aspects of the GIMP, whether you are manipulating photos or doing a multimedia project with Gimp Paint Studio, is its layer palette. This allows you to draw on top of existing images without actually changing those images.
The layers are accessible via the Layers Palette, which is usually visible by default but if not, you can open it via the Windows menu, in the Dockable Dialogue selection. To add a new layer over the top of an existing image, simply click the Create New Layer button at the bottom of the Layers Palette. At first, nothing will appear to have changed, because, of course, the layer is transparent. But if you select a paint brush draw texture on the layer, then you'll start to see the power of layering, because you can turn the layer visibility off by clicking the Eye icon to the left of the layer itself in the palette. Click again and the layer reappears.
There are many filters and effects available for the GIMP, and even an add-on package that you can use to create simple animations. There is almost no limit to what GIMP can do. GIMP has been used for professional magazine layouts, ads, portfolio and exhibition prints, digital art, distribution wallpaper, themes, and icons, game graphics, and easily competes with any similar product out on the market today.
More Info
The GIMP community can be found online at gimper.net, a site that provides examples, tutorials, and support.