I'm playing Space Station Zero wargame with an aim to get through the entire station, and I've decided to post battle reports about each Challenge along the way. These battle report contain minor spoilers, although there are a lot of branches in the campaign so what happens in my campaign is unlikely to also happen exactly the same in your campaign. This is the third battle report, covering Challenge 4 (remember, Challenge 2 was skipped due to the way the hallways of the station are laid out).
Crew member profile
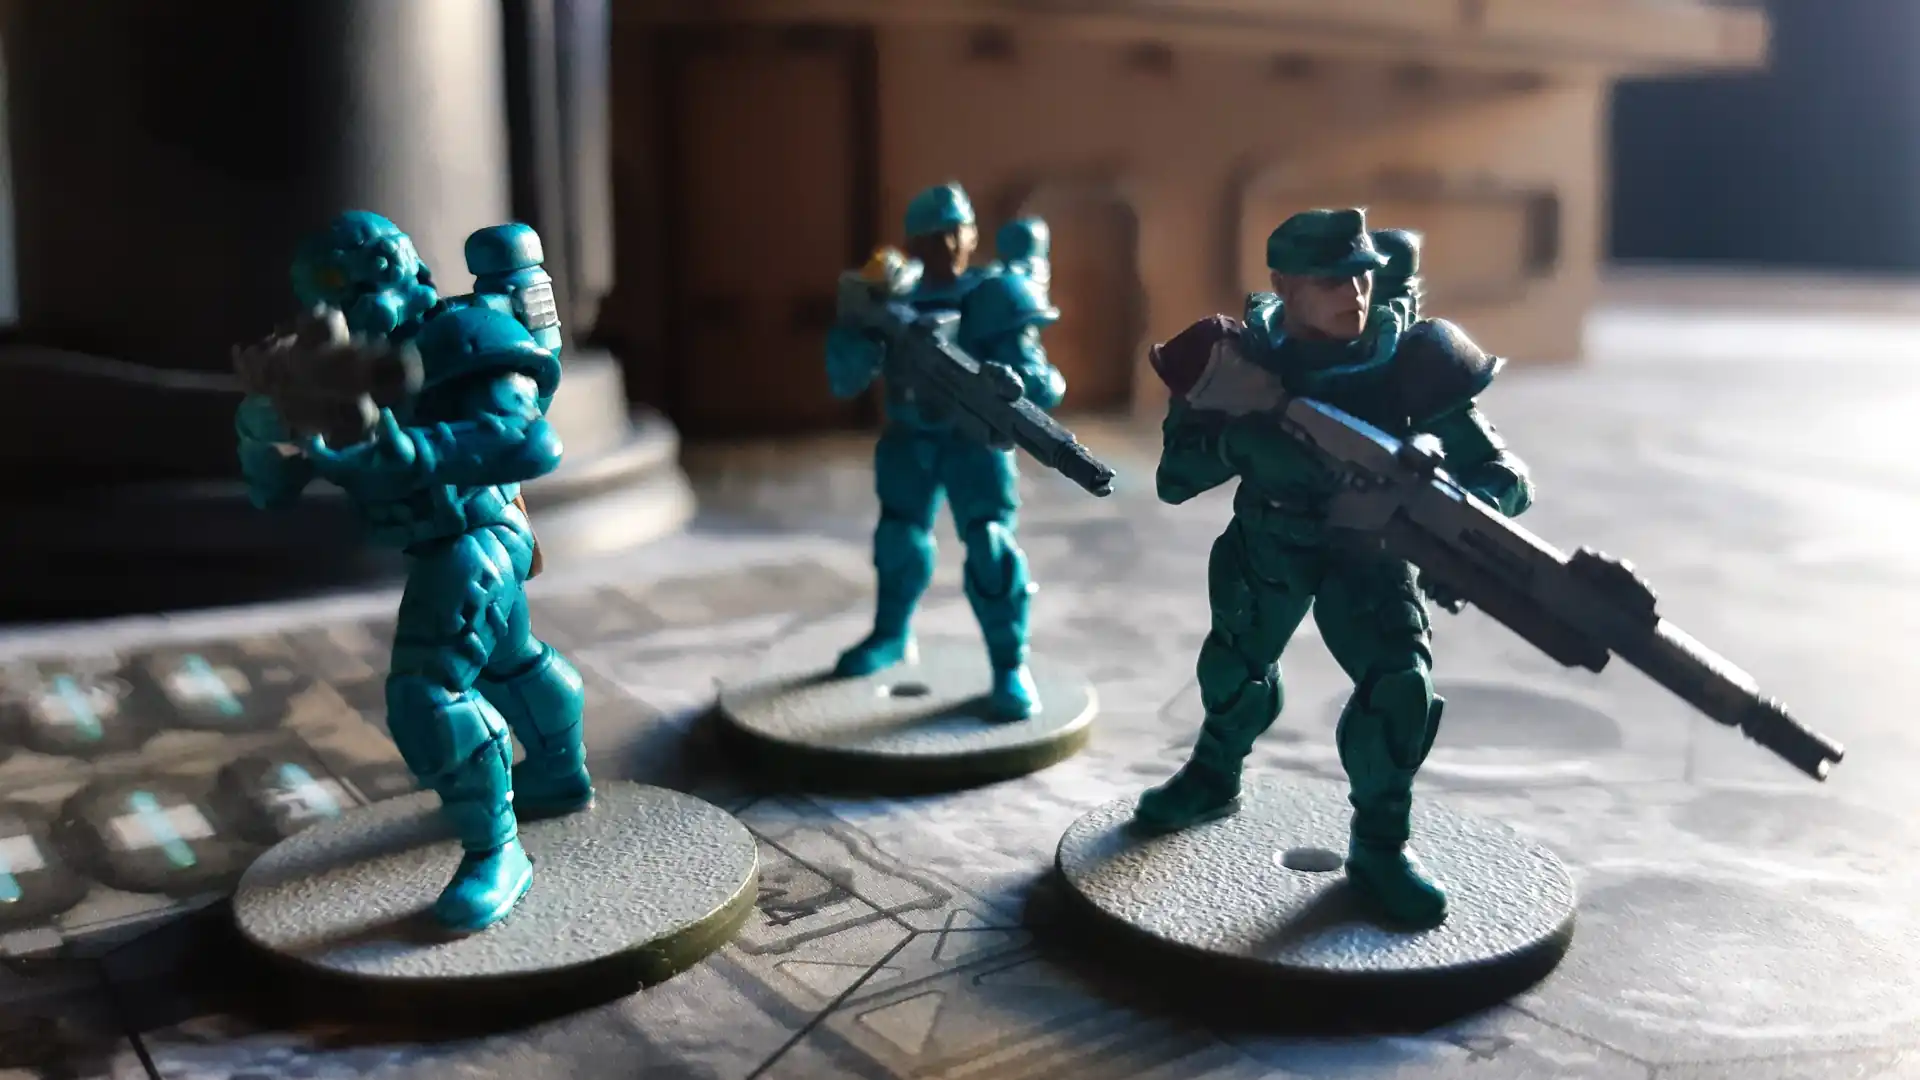
Before getting into the action, here's this episode's featured crew member (actually three crew members). I had intended to feature the crew in order of rank, but for reasons you'll learn later, I figured I'd better feature the soldiers now while they last.
New recruits all, these three brave soldiers boarded the starship Conquest thinking they were escorting the Princess Nektariin and her retinue to the distant world of Concord. Every year, the major governments of Cranon gather on Concord for a peace summit, which inevitably becomes a battle royale as nobility and elected officials alike seek to depose each other from power. War is a way of life for the people of Cranon, though, so the soldiers were looking forward to the diversion of the coziness of skirmish warfare in a palatial setting.
Instead, as we know, the Conquest failed its hyperspace calculations and arrived at the mysterious Space Station Zero.
Stats
- Life 3
- Move 4
- Combat 3
- Reflex 3
- Intelligence 2
- Armour 4
Special rule: Once a turn, a soldier can reroll 2 Combat die.
Fabrication Bay
This room contains fabrication units, but the machines are leaking chemicals giving off toxic fumes and they're guarded by Drone Swarms looking to kill potential saboteurs. I have some lovely killer drone miniatures from Blackstone Fortress, so I used those for this room. At the start of each crew member's turn, that model must make a Life Save 2. Success means no damage, and failure means up to 2 points damage. The vent that clears the room of fumes is about 12 inches from the starting zone, although precise measurement isn't provided in the book.
From the illustrated map, it looks to me like it's 8 inches plus another 6 inches, judging by the different zones that do have measurements. This is a really key bit of information that I'm surprised got left out, because if a model with Lf 3 has to move even 12 inches, that means there are 4 Life Saves to do. Assuming you win some and lose some rolls, I can imagine averaging 1 damage each activation, which kills the model before it reaches the vent.
In other words, it really feels like the layout of this room guarantees at least one model is going to die, but potentially it's going to be a lot more than that. This is the kind of obstacle in the game that baffles me. There's not much you can do to get around it. Either you built a crew member with Lf 4 and you roll really well, or else you build a crew member with Lf 5 or 6 somehow. If you didn't think to do that at the start, then you just...sort of...lose?
It's weird, but then again, it's a game. If I wasn't scared at the start of a Challenge, where would the fun be in that?
Round 1
I admit it, I'm a glutton for punishment. The starting zone of the map extends 14 inches across the map. But to me, it doesn't make sense for my crew members to start 14 inches west and 7 inches north when obviously the door of the room must be either the extreme east or south of the game board. So I deployed my crew more or less in the middle of the starting zone, assuming that the gaseous fumes don't really become apparent until you're a few steps into the room. It seemed like a good compromise between deploying halfway to the target and so far away from it that I'd have no hope of ever reaching it.
My strongest crew member is the Warmaster, so I positioned him the farthest northwest. Player goes first, so the Warmaster rolls a Life save and succeeds. No damage for him this round, so he moves 4 inches toward the Vent. He fails his initiative roll, so the Drones go next.
A Drone moves toward the Warmaster but isn't close enough to attack.
The rest of the crew moves to follow the Warmaster, with the Veteran closest of all. I forget that the Veteran has an off-hand sidearm, and forego his attack action.
Here's a twist, though. The Engineer and Pilot don't move toward the Vent. They're looking at the Fabrication machines from across the room, and decide that poisonous gas or no, the ability to manufacture anything you need could be pretty useful.
The remaining two Drone Swarms focus on blocking the Warmaster's path. They're still way up ahead though, and they only have melee attacks, so not an immediate threat.
Round 2
Warmaster moves toward the vent, attacks a swarm drone from range and deals some damage. The Drone Swarm eats 1 point of damage from any weapon that doesn't have the Energy keyword, and the Warmaster uses a Kinetic rocket launcher. He also fails his initiative roll, so the Drones get to go next.
The Drones continue to move in on the crew, of course, but the first Drone makes the mistake of getting into combat with the Veteran. The Veteran takes a point of damage from the Drone, and then another point of damage from the toxic fumes. But he's got an Energy Melee Weapon (that's what it's called in the book, and I have to admit that while it lacks flavour it sure does say exactly what it does on the tin), and it grants him +3 Combat dice on top of the 4 he already has! He rolls 7 dice and obliterates the first Drone Swarm.
The soldiers grunt and shout and squeeze their triggers at the Drone Swarms ahead, covering the Warmaster's advance. They deal damage, easy, because they get to re-roll their attacks (1 re-roll for being from a Warship, and 2 for being battle brothers within 1 inch of one another). The problem? Two of them failed their Life Saves, so they take damage, and the Drones have Lf 7, and eat 1 point of damage from Kinetic weapons (which is of course what the soldiers are armed with).
Good round, but also a rough round!
Round 3
Same old, same old. Literally everybody moves toward their designated target, and nobody arrives. The Soldier boys fail a few Life Saves again, racking up damage. The Medic is completely useless. She's always in the wrong place at the wrong time, and so far has healed nobody.
Round 4
The Warmaster moves and manages to finish off a Swarm Drone.
The Veteran fails his Life Save and is down. The Veteran. Is down. (And of course the Medic is somehow still inches away from him, and even if she were near him, it's too late for healing once you're down.)
There's only one Drone left, and it's hanging in there, but also it has yet to actually deal damage. The soldiers target it and deal damage, but it's still up.
The Engineer and Pilot arrive at a Fabricator. I don't know how it's possible, but neither of them have yet failed a Life Save, so they're ready to hack. That's when I read that to use the Fabricator for an anti-Drone weapon requires an Intelligence Challenge Test 4 (8+). Once again, i don't understand the numbers in this game! [Editor's note, from the future: I do now. In this case, I should have converted this Challenge Test to an Extended Challenge Test.] Who's got a crew member with In 4 by the third Challenge? I guess players running smaller crews do, but that's not me, so that Test is literally impossible. I briefly consider making the Test an Exntended Test, but there's only one Drone left at this point, and it's dealt no damage, so frankly it doesn't even seem worth the effort.
This is a pretty disappointing dead end for my Engineer and Pilot, in terms of roleplay, so I make an executive decision. The Challenge's reward is that one crew member can make a single roll Intelligence Challenge Test 4 in hopes of fabricating one item from the Advanced Technology gear list. That's impossible for my crew, so I decide to allow the Engineer and Pilot each to roll the test. As long as they accumulate 4 successes between them, they get the reward. They each only have In 2, so I need two 100% successful rolls for this to work.
They make their rolls.
The Pilot fails completely, so I guess no reward this time. But I roll the Engineer's Test anyway because I never forego a roll, and amazingly he rolls a 12 on each dice, scoring a Critical Success. The Engineer and Pilot manage to fabricate a point-to-point teleporter!
Round 5
At this point, I'm frankly amazed my crew is still alive. I was sure they'd have all died from fumes by now.
The Warmaster continues to advance toward the vent, dealing damage to the Drone trailing behind him. The Soldiers fail their Life Saves again and one of them falls to the ground. The other two deal yet more damage to the Drone Swarm, but it eats each point of damage and takes a total of 0 damage.
The Medic has gotten distracted by the effects of the toxic fumes, and just stands around taking notes.
You'd think that the Engineer and Pilot, having gained a shiny new point-to-point teleporter, would just beam over to the exhaust vent and open it. However, you can only beam to a point on the battefield you can see, and there's a machinery hetween them and the vent!
If they had chosen any other Fabricator machine to hack, they'd have been in sight of the vent. As usual, I take no personal responsibility for the choices of player characters.
Round 6
Believe it or not. the Warmaster has still only taken 1 point of damage from the fumes. He rounds the corner of the machinery and is one metric inch (it's like an Imperial inch, but expressed as 28mm) from the vent. I assume he has to be in base contact, so there's one more round for everyone to get through.
The Soldiers succeed their Life Saves and also kill the final Drone!
The Medic falls to the ground, unconscious from toxic fumes.
The Engineer and Pilot are making their way toward the vent just in case something goes wrong.
Round 7
Easy. The Warmaster opens the ventillation, the toxic fumes are eliminated, and everybody who's not unconscious is fine.
A stressful scenario, seemingly impossible, but the crew mostly got through it and the Engineer even got a teleporter!
Post game
Everybody gets experience points (that's 6 XP total for the Warmaster so far, and 3 for each crew member). Because three crew members have been removed from the battlefield, I have to roll on the Injuries and Death table.
- Medic: Rolls 12 for a full recovery. No penalties whatsoever. This kind of makes sense because she was the last to go down.
- Veteran: Rolls 19 for a recovery but with the penalty that he has to sit out the next Challenge.
- Soldier: Rolls 9 and is permantly dead.
Yes, it's the game's first death, and as a Trekker I'm proud that it was a redshirt (even though I tried to trick fate by painting them turquoise).
There are 3 doors in this room. There's a Jammed Door leading to Challenge 3 (where the crew just came from), a Rusted Door leading to Challenge 2, and the Ventillation Shaft leading to Challenge 6. It makes the most sense, I think, for them to go through the Ventillation Shaft because they're standing right in front of it. And anyway, I'm assuming the Rusted Door looks like it won't open, or else I think they'd have rushed towards it to get away from the fumes. So next up is Challenge 6: Pod 6.
Photo by Seth Kenlon, Creative Commons cc0.