I'm playing Space Station Zero wargame with an aim to get through the entire station, and I've decided to post battle reports about each Challenge along the way. These battle report contain minor spoilers, although there are a lot of branches in the campaign so what happens in my campaign is unlikely to also happen exactly the same in your campaign. This is the fourth battle report, covering Challenge 6.
In the rulebook, there's a section about Extended Challenge Tests, which isn't a term that the book uses again after that section. Up to Challenge 6, I thought an Extended Challenge Test was something the book would eventually offer the player when appropriate, something along the lines of "Perform an Extended Challenge Test 10 (4) to disarm the bomb." But, as it turns out, it's actually a call the player is supposed to make when faced with a Challenge Test that's impossible to make.
Unless, that is, it's impossible by design.
How do you know when a Challenge is impossible by design? When the book uses the phrase "single roll" as a qualifier for a Challenge Test, then you know that you're not allowed to divide the roll into an Extended Challenge.
I believe that when a Challenge Test is possible, then you may not treat it as an Extended Challenge. I'm not entirely sure that's correct, and I wish the book was clear about when you're allowed to take one success and carry it over to the next Test.
Here's what I think the logic is:
- If a Challenge Test's target is a number equal to or less than the tested crew member's stat, then it must be treated as a Challenge Test (single roll).
- If a Challenge Test's target is a number greater than the tested crew member's stat, then treat it as an Extended Challenge Test.
- All Combat Tests are Challenge Test (single roll), even if it's impossible.
Right or wrong, that's the logic I'm playing with from this point on.
Crew member profile
Before getting into the action, here's this episode's featured crew member. There were a lot of heroics in Challenge 6, but I think the Pilot deserves to be featured.
Formerly a civilian pilot, Lieutenant Piedra was recently recruited into the Cranon voidforce. The Conquest is her first major assignment and, of course, it was meant to be a nice gentle introduction into service. After the failed hyperspace jump, eyes were on her for an explanation with, she detected, not just a little suspicion. With the help of the engineer, she was able to prove that the miscalculation had occurred in the circuitry of the Conquest itself, suggesting sabotage. Before anyone could address that, though, the Princess Nektariin was insisting to be escorted onto the strange space station appearing on the ship viewscreens.
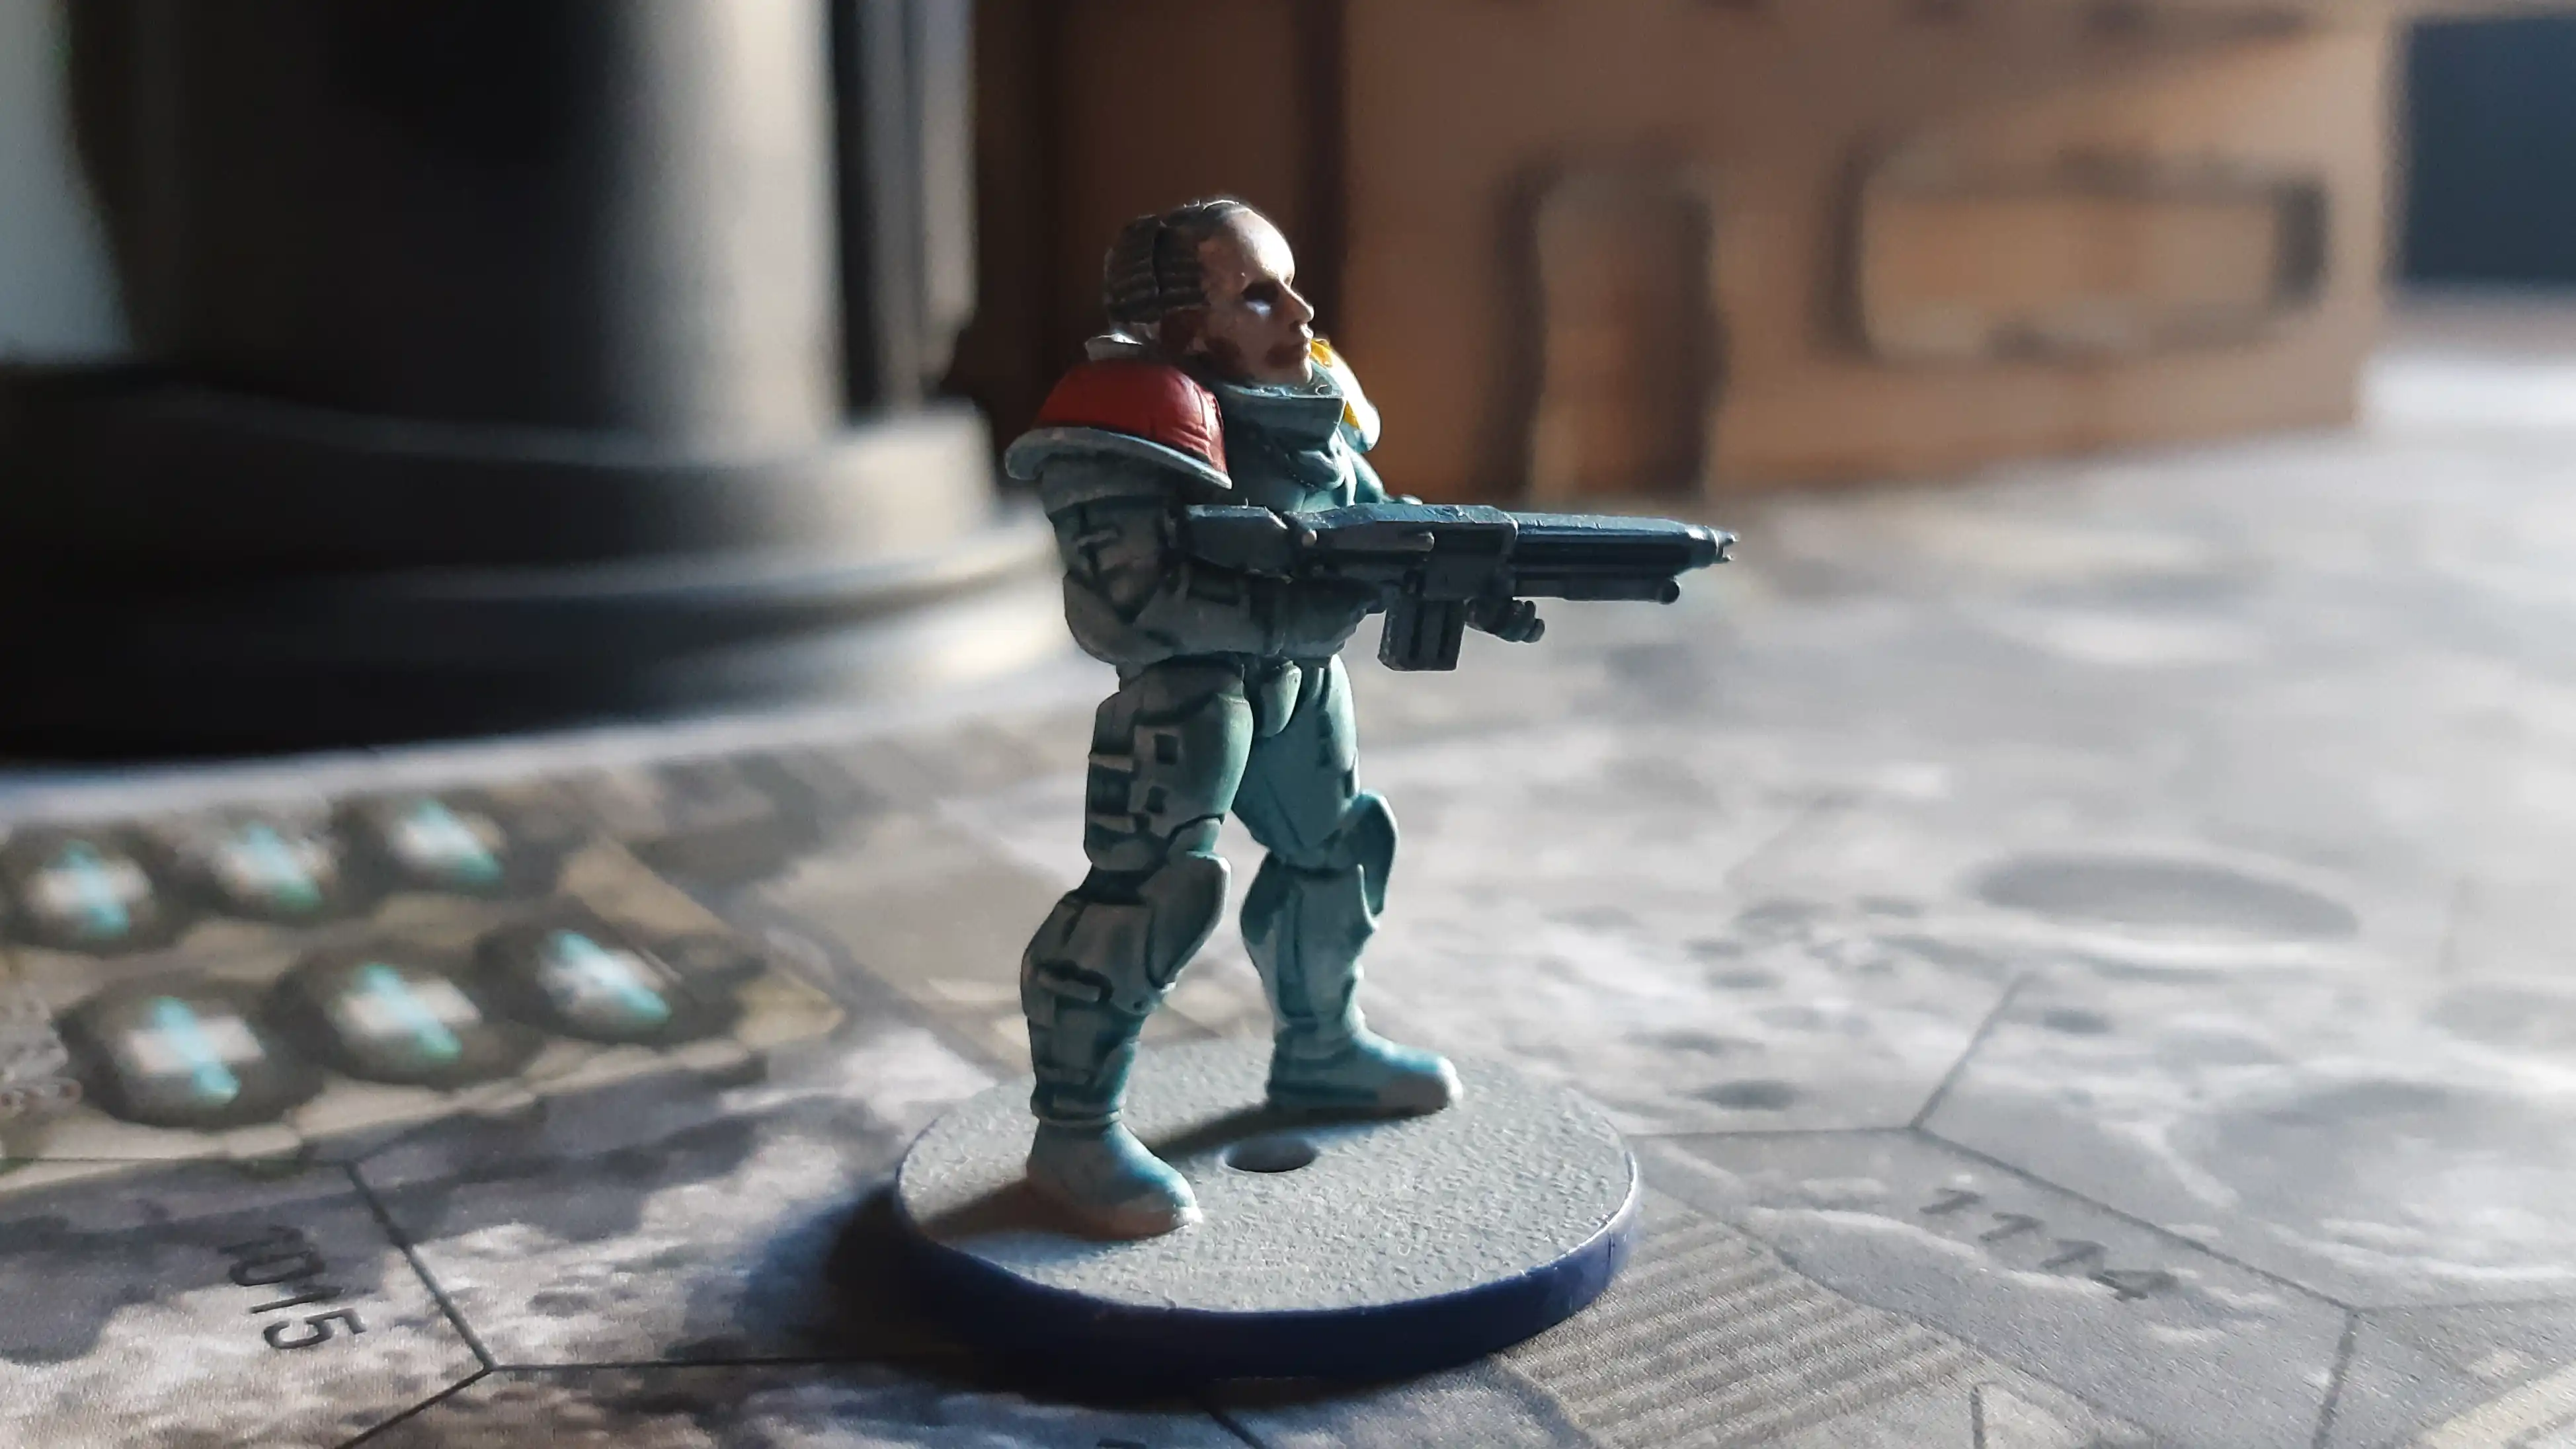
Stats
- Life 3
- Move 4
- Combat 2
- Reaction 4
- Intelligence 2
- Armour 4
Special weapon: Energy melee weapon that grants +3 Co and ignores armour.
Pod 6
There's a lot going on in this room. First, there's a virus bomb several inches from the starting zone. There are also mutants (Lf 4, but melee only) waiting to attack, and some stationary gun turrets that fire across the battlefield. Should the virus bomb detonate, it's basically game over, so I didn't want that to happen.
The bomb explodes at the end of round 5 unless disabled by an Challenge Test 10. That meant I needed to get as many of my crew to the bomb, ignoring all other danger, just so everyone can contribute to the [Extended] Challenge Test. To make matters worse, the Veteran is sitting this game out because of an injury from the last room, and one soldier is dead.
Round 1
Thinking myself very clever, I activated the Engineer first. He just fabricated a fancy new teleporter in the Fabrication Bay, so he doesn't even have to move to get to the virus bomb. He activated his teleporter, appeared next to the bomb, blissfully ignoring the gun turrets and mutants, and rolled his Reaction Challenge Test. He scored 3 successes, so the bomb only needs 7 across 5 rounds to be deactivated. It was looking like this Challenge wasn't going to be so bad after all! As long as I could protect the Engineer over the next couple of rounds, it seemed like he'd have the bomb shutdown easily, even allowing for a few failures here and there.
And then I read the Challenge again and noticed that the first model to activate must roll a Test at the end of its turn to determine whether the floor collapsed. You can probably predict how the test went. The floor collapsed beneath the Engineer, and he's removed from the battlefield, uninjured but out of action.
A mutant activated next, heading toward the crew. Having my clever battle plan collapse along with the floor, I have to admit I lost focus at this point. I completely forgot that the gun turrets existed, but to make up for it I also forgot that the mutants had only melee weapons. I was using Genestealer Cultists as mutants, and the miniatures are holding guns, so I just fell into the WYSIWYG habit. So the mutant takes a shot at the crew, and deals no damage thanks to their military-grade armour.
The crew advanced, the mutants took positions behind some pipelines to flank them (almost like the gun turrets that were actually written into the Challenge, conveniently).
Round 2
My best hope was to get my entire crew to the virus bomb as soon as possible. As long as they all arrived by Round 5, I felt like there was a fair to good chance of scoring seven further successes. Then I could turn my attention to the mutants.
Unfortunately, as with my original plan, the battlefield didn't exactly agree with me.
In this round, the crew advanced toward the bomb, and the mutants started to converge. The mutants get a +2 Co bonus in melee, so it only made sense for them to go in for close combat as soon as a crew member was in range.
One of the soldiers took a hit, but the medic activated next, rushed up behind him, and healed him. What a hero!
Better still, the warmaster and a soldier managed to kill one mutant before he could do any harm. Things were really looking up. I couldn't see anything possibly going wrong now.
Round 3
Still not at the bomb, the crew members are swarmed by mutants. The first mutant to activate attacked the soldier, who had pulled ahead in the scramble toward the bomb. The mutant rolled a Critical Success, dealing 8 points of damage to the soldier. It didn't matter what armour or saves the soldier made, he was dead. That's two soldiers gone, now.
Frustratingly, the pilot was just an inch away from one of the mutants. I didn't want to waste her move on taking out the mutant, though, but I did want to eliminate a threat. So on my next activation, I moved the warmaster toward the bomb and out of convenient melee range of the pilot's mutant. I figured the mutants would surely activate next, forcing the mutant to attack the pilot. But of course, the warmaster succeeded on his activation. I moved the medic toward the bomb, and then she failed her initiative roll. The mutant's most convenient target had become the pilot, so it moved over to her and attacked. The pilot took a point of damage, and then it was her turn. Using her energy melee weapon with its +3 to her Combat, she killed the mutant in one blow, and then moved toward the bomb.
Two mutants were still on the board, but also there was only two rounds until detonation!
Round 4
The warmaster, medic, and the one soldier I had left made it to the bomb this round. Combined, they managed to accumulate 4 successes for a total of 7. The pilot's delay tactics were working. The mutants were now lagging behind the crew by one move. At the very last moment, I moved the pilot toward the bomb, but only after she spent an attack on a necessary attack.
Round 5
I blame the dice, but my crew failed to get any successes this round. Not a single success to defuse a bomb this round. Or at least, the crew already at the bomb. Even after all the failures, there was the pilot who had yet to get to the bomb.
When the pilot activated, she moved into base contact with the bomb, and rolled a very, very important Reaction Challenge Test. She needed 3 successes or the bomb detonated, end of Challenge, end of game. I grabbed four dice, and rolled.
Round 6
Yes, the pilot scored 3 successes! The bomb did not explode, and in this round the crew did an about-face and obliterated the mutants. There were a few re-rolls, thanks to their Harmonious Culture special rule, but the mutants had each been injured already anyway, and neither of them even got to activate this round. Done and dusted.
Post game
Interestingly, a lot happened during the end game this time.
Of course everybody gets XP, and the warmaster even leveled up. I chose to raise his Intelligence by 1.
The engineer is fine and didn't even have to roll on the Injury table. The injured soldier, however, did have to roll, and sadly he's dead and gone.
But wait, there's more. The floor of the whole room collapses, sending my crew to a random table of surprise destinations. For better or for worse, I rolled for Challenge 13, so that's up next. Forbodingly, the book states explicitly that this is a No Return Challenge. I'm not sure what the ramifications of that are, yet, but it doesn't sound great.
This was an exciting and agonizing game session, but at least the Veteran is back for the next challenge. And besides, the worst is probably behind me. How could things possibly get worse? Tune in next time to find out!
Photo by Seth Kenlon, Creative Commons cc0.